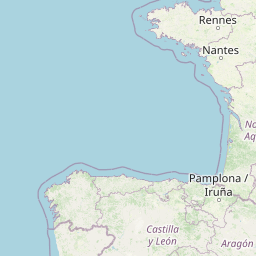
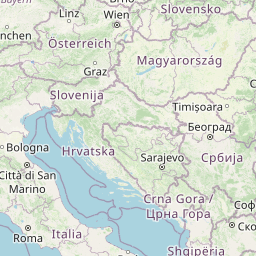
| Head south | 45 m |
| Turn right onto Estrada do Cabo da Roca | 200 m |
| Turn right onto Estrada do Cabo da Roca | 3 |
| Turn right onto EN 247 | 5 |
| Turn left onto Avenida de Nossa Senhora da Assunção (EN 247-5) | 200 m |
| Continue slightly right onto Rua de Cascais (EN 9-1) | 1 |
| Continue onto Estrada da Malveira da Serra (EN 9-1) | 1.5 |
| Enter the traffic circle and take the 2nd exit onto Estrada da Malveira da Serra (EN 9-1) | 20 m |
| Exit the traffic circle onto Estrada da Malveira da Serra (EN 9-1) | 550 m |
| Enter Estrada da Malveira da Serra and take the 2nd exit onto Estrada da Malveira da Serra (EN 9-1) | 30 m |
| Exit the traffic circle onto Estrada da Malveira da Serra (EN 9-1) | 450 m |
| Take the ramp on the right towards A 16: Lisboa | 15 |
| Take the ramp towards A 9: CREL | 200 m |
| Merge left onto Circular Regional Exterior de Lisboa (CREL) (A 9) | 35 |
| Take the ramp towards A 1: Porto | 200 m |
| Keep left towards A 1: Porto | 400 m |
| Merge left onto Autoestrada do Norte (A 1) | 80 |
| Take the ramp towards A 23: Abrantes | 300 m |
| Continue onto Autoestrada da Beira Interior (A 23) | 200 |
| Keep left towards Vilar Formoso | 1.5 |
| Merge right onto Autoestrada das Beiras Litoral e Alta (A 25) | 35 |
| Continue onto A-62 | 100 |
| Keep left onto Autovía de Castilla (A-62) | 90 |
| Merge left onto Autovía del Noroeste (A-6) | 1.5 |
| Keep right towards E-80: Valladolid | 60 |
| Keep left towards A-62: Burgos | 70 |
| Keep left onto Autovía de Castilla (A-62) | 7 |
| Merge right onto Circunvalación de Burgos (BU-30) | 4.5 |
| Merge right onto Autovía del Norte (A-1) | 6 |
| Continue towards E-5: Vitoria | 80 |
| Merge left onto A-1 | 15 |
| Keep left towards Foronda | 9 |
| Take the ramp towards N-622: Vitoria-Gasteiz | 250 m |
| Keep left towards aeroportua | 250 m |
| Keep right towards AP-68: aeroportua | 450 m |
| Keep left towards N-622: Aireportua | 250 m |
| Merge left onto N-622 | 900 m |
| Take the ramp towards N-624: Foronda | 450 m |
| Continue straight | 300 m |
| Continue straight | 450 m |
| Keep right towards A-3604: Etxabarri-Ibiña | 1 |
| Keep left at the fork | 400 m |
| Merge left onto AP-1 | 45 |
| Keep left towards AP-1: Elgoibar | 550 m |
| Continue onto Iparraldeko Autobidea / Autopista del Norte (AP-1) | 400 m |
| Continue onto Autopista del Cantábrico / Kantauriko Autobidea (AP-1) | 40 |
| Continue towards E-5: Hernani | 8 |
| Continue onto Bizkaiko Golkoko Autobidea (AP-1) | 150 m |
| Continue onto Urumea Zubia (AP-1) | 1 |
| Continue onto AP-1/AP-8 (AP-1) | 2 |
| Continue onto Aginaztegi tunela (AP-1) | 500 m |
| Continue onto Bizkaiko Golkoko Autobidea (AP-1) | 3 |
| Continue onto AP-1/AP-8 (AP-1) | 2 |
| Continue onto Bizkaiko Golkoko Autobidea (AP-1) | 3.5 |
| Keep left onto Bizkaiko Golkoko Autobidea (AP-1) | 250 m |
| Continue onto AP-1/AP-8 (AP-1) | 7 |
| Continue onto Zubi Nazioartekoa (AP-1) | 100 m |
| Continue onto Autoroute de la Côte Basque (A 63) | 30 |
| Continue onto Autoroute des Estuaires (A 63) | 3 |
| Take the ramp towards A 64: Toulouse | 550 m |
| Continue onto A 64 | 300 |
| Keep right towards E 80: Périphérique extérieur | 350 m |
| Merge left onto Périphérique Extérieur (A 620) | 9 |
| Merge left onto Autoroute des Deux Mers (A 61) | 150 |
| Keep left towards Lyon | 550 m |
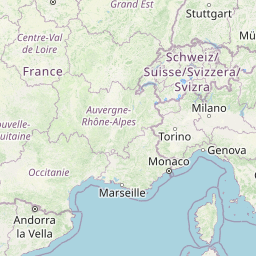
| Merge left onto La Languedocienne (A 9) | 80 |
| Keep left towards A 9: Lyon | 55 |
| Take the ramp towards A 54: Nîmes-Centre | 25 |
| Continue onto N 572 | 4.5 |
| Continue onto N 113 | 20 |
| Continue onto A 54 | 25 |
| Keep right towards A 7: Nice | 550 m |
| Merge left onto Autoroute du Soleil (A 7) | 10 |
| Keep left towards A 8: Nice | 200 |
| Continue onto Autostrada dei Fiori (A10) | 100 |
| Continue onto Galleria Artificiale Mongrifone | 450 m |
| Continue onto Galleria Letimbro | 1.5 |
| Continue onto Galleria Artificiale San Giuseppe | 350 m |
| Continue onto Galleria Ranco | 700 m |
| Continue onto Galleria Termine | 250 m |
| Continue onto Galleria Monte Pasasco | 800 m |
| Continue onto Galleria Torre Faraggiana (A10) | 250 m |
| Continue onto Autostrada dei Fiori (A10) | 2 |
| Continue onto Galleria Fighetto | 350 m |
| Continue onto Galleria Pecorile SUD | 400 m |
| Continue onto Galleria Arma | 450 m |
| Continue onto Galleria Terrizza | 250 m |
| Continue onto Galleria Cassisi | 400 m |
| Continue onto Galleria Casanova | 500 m |
| Continue onto Galleria Costa | 350 m |
| Continue onto Viadotto Costa | 1.5 |
| Continue onto Autostrada dei Fiori | 7 |
| Continue onto Galleria Arrestra | 900 m |
| Continue onto Galleria Cogoleto | 700 m |
| Continue onto Autostrada dei Fiori | 20 |
| Keep right towards A7: MILANO | 500 m |
| Merge left onto Autostrada dei Giovi - Serravalle (A7) | 2.5 |
| Take the ramp onto A7 dir. Milano - Raccordo A12 dir. Livorno (A12) | 400 m |
| Continue onto A12 dir. Livorno - Raccordo A7/Genova Est (A12) | 3.5 |
| Continue onto A12 dir. Livorno - Genova Est/Genova Nervi | 7 |
| Continue onto A12 dir. Livorno - Genova Nervi/Recco (A12) | 9 |
| Continue onto Galleria Castelletto (A12) | 2 |
| Continue onto A12 - dir. Livorno - Genova Nervi/Recco (A12) | 450 m |
| Continue onto A12 dir. Livorno - Recco/Rapallo (A12) | 5.5 |
| Continue onto A12 dir. Livorno - Rapallo/Chiavari (A12) | 1.5 |
| Continue onto Galleria Sant'Agostino II (A12) | 400 m |
| Continue onto A12 dir. Livorno - Rapallo/Chiavari (A12) | 300 m |
| Continue onto Galleria San Bartolomeo (A12) | 600 m |
| Continue onto A12 dir. Livorno - Rapallo/Chiavari (A12) | 7 |
| Continue onto A12 dir. Livorno - Chiavari/Lavagna (A12) | 3 |
| Continue onto A12 dir. Livorno - Lavagna/Sestri Levante (A12) | 8 |
| Continue onto A12 dir. Livorno - Sestri Levante/Deiva Marina (A12) | 10 |
| Continue onto A12 dir. Livorno - Deiva Marina/Carrodano Levanto (A12) | 10 |
| Continue onto Galleria Bordigona | 500 m |
| Continue onto A12 dir. Livorno - Carrodano Levanto/Brugnato Borghetto Vara (A12) | 5.5 |
| Continue onto A12 dir Livorno - Brugnato Borghetto Vara/Bivio A15 Parma (A12) | 20 |
| Continue onto A12 dir. Livorno - Brugnato Borghetto Vara/Bivio A15 Parma (A12) | 400 m |
| Continue onto A12 dir. Livorno - Bivio A15/Sarzana (A12) | 350 m |
| Continue onto Autostrada Azzurra (A12) | 40 |
| Take the ramp towards A11: VIAREGGIO CAMAIORE | 700 m |
| Keep left towards Firenze | 300 m |
| Continue onto Diramazione Lucca ovest - Viareggio (A11/A12) | 20 |
| Keep left towards Firenze | 700 m |
| Merge left towards Firenze | 60 |
| Take the ramp towards A1: BOLOGNA - ROMA | 250 m |
| Keep right towards A1: ROMA | 550 m |
| Merge left onto Autostrada del Sole (A1) | 450 |
| Take the ramp towards Salerno | 900 m |
| Continue onto Autostrada A30 Caserta-Salerno | 50 |
| Keep left onto Autostrada A30 Caserta-Salerno (A30) | 5 |
| Continue onto A30 Autostrada Caserta Salerno (A30) | 1 |
| Continue onto Autostrada del Mediterraneo (A2) | 8 |
| Keep left onto Autostrada del Mediterraneo (A2) | 250 |
| Continue onto Acqua di Calci (A2) | 350 m |
| Continue onto Autostrada Viadotto Molino Irto (A2) | 600 m |
| Continue onto Viadotto Torre Trocini (A2) | 550 m |
| Continue onto Viadotto Specola (A2) | 400 m |
| Continue onto Viadotto San Martino (A2) | 600 m |
| Continue onto Autostrada del Mediterraneo (A2) | 300 m |
| Continue onto Viadotto Profenna (A2) | 900 m |
| Continue onto Autostrada del Mediterraneo (A2) | 150 |
| Take the ramp | 1 |
| Enter the traffic circle and take the 4th exit | 100 m |
| Exit the traffic circle | 350 m |
| Keep right towards A2: Salerno | 450 m |
| Merge left onto Diramazione Reggio Calabria (A2dirRC) | 250 m |
| Take the ramp | 700 m |
| Continue onto Strada Statale 738 di Villa San Giovanni (SS738) | 1.5 |
| Turn left onto Viale Italia | 200 m |
| Turn left | 90 m |
| Continue onto Via dei Marinai d'Italia | 250 m |
| Make a slight left | 100 m |
| Keep straight at the fork | 200 m |
| Turn left | 200 m |
| Make a sharp right | 20 m |
| Take the ferry Messina - Villa San Giovanni | 7 |
| Continue slight left | 700 m |
| Turn left | 35 m |
| Go straight onto Viale della Libertà | 900 m |
| Make a slight right onto Corso Cavour | 200 m |
| Turn right onto Viale Boccetta | 900 m |
| Take the ramp towards A20: autostrade | 150 m |
| Continue towards A20 | 200 m |
| Continue straight | 350 m |
| Keep right towards Catania | 400 m |
| Merge left onto Autostrada Messina-Palermo (A20) | 900 m |
| Continue onto Galleria Spadalara (A20) | 450 m |
| Continue onto Viadotto Camaro (A20) | 350 m |
| Keep left onto Autostrada Messina-Palermo (A20) | 350 m |
| Continue onto Galleria Perara (A20) | 450 m |
| Continue onto Viadotto Calorende (A20) | 250 m |
| Continue onto Galleria Bordonaro (A20) | 250 m |
| Continue onto Viadotto Bordonaro (A20) | 550 m |
| Continue onto Autostrada Messina-Palermo (A20) | 5.5 |
| Continue onto Autostrada Messina-Catania (A18) | 700 m |
| Take the ramp on the left | 150 m |
| Merge right onto Autostrada Messina-Catania (A18) | 4.5 |
| Continue onto Galleria Serra (A18) | 350 m |
| Continue onto Autostrada Messina-Catania (A18) | 3.5 |
| Continue onto Galleria Piano Cutiri (A18) | 1.5 |
| Continue onto Viadotto Racinazzi (A18) | 200 m |
| Continue onto Galleria Scaletta Zanclea (A18) | 600 m |
| Continue onto Autostrada Messina-Catania (A18) | 70 |
| Take the ramp on the left | 200 m |
| Merge right onto Autostrada Messina-Catania (A18) | 400 m |
| Keep left towards tangenziale | 80 m |
| Continue onto Tangenziale Ovest di Catania (RA15) | 3 |
| Continue onto Viadotto San Paolo (RA15) | 400 m |
| Continue onto Tangenziale Ovest di Catania (RA15) | 15 |
| Keep left towards Lentini-Carlentini | 25 |
| Continue onto Strada statale Orientale Sicula (SS114) | 20 |
| Continue onto Strada statale Orientale Sicula (SS114) | 2 |
| Continue onto Autostrada Siracusa-Gela (A18) | 45 |
| Take the ramp | 1 |
| Keep left at the fork | 700 m |
| Keep left at the fork | 80 m |
| Enter the traffic circle and take the 3rd exit | 90 m |
| Exit the traffic circle | 60 m |
| Continue onto Strada provinciale Ispica-Pozzallo (SP46) | 1 |
| Continue onto Via Giuseppe Renda (SP46) | 2.5 |
| Continue onto Via Mario Rapisardi | 150 m |
| Enter the traffic circle and take the 2nd exit onto Via Mario Rapisardi | 20 m |
| Exit the traffic circle onto Via Mario Rapisardi | 250 m |
| Enter the traffic circle and take the 1st exit | 10 m |
| Exit the traffic circle | 70 m |
| Enter the traffic circle and take the 1st exit | 3.5 m |
| Exit the traffic circle | 70 m |
| Continue onto Viale Europa | 300 m |
| Keep left at the fork | 10 m |
| Keep left at the fork | 20 m |
| Keep right onto Viale Papa Giovanni Ventitreesimo | 400 m |
| Enter the traffic circle and take the 1st exit | 3 m |
| Exit the traffic circle | 100 m |
| Continue onto Via Torino | 150 m |
| Turn left onto Via Roma | 900 m |
| Turn right | 25 m |
| Turn left onto Largo dei Vespri Siciliani | 500 m |
| Continue onto Viale Medaglie d'Oro Lunga Navigazione | 800 m |
| Make a slight left | 90 m |
| Turn left | 20 m |
| Turn right | 300 m |
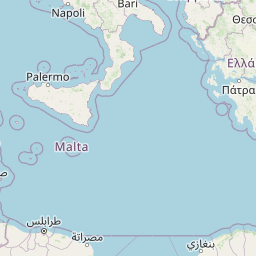
| Take the ferry Malta - Pozzallo | 100 |
| Continue straight | 70 m |
| Turn left | 35 m |
| Turn left onto Xatt l-Għassara tal-Għeneb | 90 m |
| Continue onto Triq Moll iċ-Ċangatura | 250 m |
| Enter the traffic circle and take the 3rd exit | 60 m |
| Exit the traffic circle | 25 m |
| Continue onto It-Telgħa ta Spencer | 250 m |
| Enter the traffic circle and take the 1st exit | 10 m |
| Exit the traffic circle | 25 m |
| Continue onto It-Telgħa ta' Spencer | 100 m |
| Turn left onto Triq Nazzjonali (6) | 200 m |
| Take the ramp onto Triq Nazzjonali (6) | 55 m |
| Keep right onto Triq Nazzjonali (6) | 50 m |
| Turn right to stay on Triq Nazzjonali (6) | 400 m |
| Take the ramp on the left towards Tal-Pietà | 200 m |
| Make a slight right onto Triq l-Indipendenza | 150 m |
| Turn right onto Triq ix-Xatt tal-Imsida (22) | 1.5 |
| Continue onto Triq Mikiel Anton Vassalli | 500 m |
| Enter Ir-Roundabout tal-Qroqq and take the 2nd exit | 45 m |
| Exit the traffic circle | 200 m |
| Continue onto Triq Dun Karm | 150 m |
| Take the ramp | 350 m |
| Keep right at the fork | 80 m |
| Continue onto Triq Sir Anthony Mamo | 550 m |
| Enter the traffic circle and take the 1st exit onto Triq Sir Anthony Mamo | 20 m |
| Exit the traffic circle onto Triq Sir Anthony Mamo | 800 m |
| Turn left onto Triq Bella Vista (129) | 550 m |
| Enter the traffic circle and take the 1st exit onto Triq tal-Balal (18) | 10 m |
| Exit the traffic circle onto Triq tal-Balal (18) | 300 m |
| Enter the traffic circle and take the 1st exit onto Triq tal-Balal (18) | 15 m |
| Exit the traffic circle onto Triq tal-Balal (18) | 550 m |
| Enter the traffic circle and take the 2nd exit onto Triq tal-Balal (18) | 10 m |
| Exit the traffic circle onto Triq tal-Balal (18) | 800 m |
| Enter the traffic circle and take the 1st exit onto Triq tal-Balal (18) | 20 m |
| Exit the traffic circle onto Triq tal-Balal (18) | 550 m |
| Enter the traffic circle and take the 2nd exit onto Triq Margaret A. Murray (118) | 45 m |
| Exit the traffic circle onto Triq Margaret A. Murray (118) | 250 m |
| Enter the traffic circle and take the 1st exit onto Triq Andrea Debono (118) | 20 m |
| Exit the traffic circle onto Triq Andrea Debono (118) | 800 m |
| Enter the traffic circle and take the 2nd exit onto Triq Jean Houel (118) | 15 m |
| Exit the traffic circle onto Triq Jean Houel (118) | 350 m |
| Enter the traffic circle and take the 3rd exit onto Telgħa t'Alla w'Ommu (120) | 45 m |
| Exit the traffic circle onto Telgħa t'Alla w'Ommu (120) | 400 m |
| Keep right onto Triq is-Salina (120) | 80 m |
| Enter the traffic circle and take the 1st exit onto Triq is-Salina (120) | 35 m |
| Exit the traffic circle onto Triq is-Salina (120) | 2 |
| Make a slight left onto Triq is-Salina (120) | 250 m |
| Enter the traffic circle and take the 1st exit onto Triq is-Salini (1) | 6 m |
| Exit the traffic circle onto Triq is-Salini (1) | 300 m |
| Continue onto Kennedy Drive (1) | 900 m |
| Enter the traffic circle and take the 2nd exit onto Dawret San Pawl (1) | 45 m |
| Exit the traffic circle onto Dawret San Pawl (1) | 2.5 |
| Enter the traffic circle and take the 2nd exit onto Triq Għajn Tuffieħa (1) | 70 m |
| Exit the traffic circle onto Triq Għajn Tuffieħa (1) | 100 m |
| Enter the traffic circle and take the 1st exit towards Għawdex | 9 m |
| Exit the traffic circle towards Għawdex | 400 m |
| Continue onto Telgħet ix-Xemxija (1) | 700 m |
| Enter the traffic circle and take the 2nd exit towards Gozo | 10 m |
| Exit the traffic circle towards Gozo | 35 m |
| Continue onto Triq il-Mistra (1) | 600 m |
| Continue onto It-Telgħa ta' Selmun (1) | 1 |
| Enter the traffic circle and take the 1st exit towards Għawdex (Gozo) | 10 m |
| Exit the traffic circle towards Għawdex (Gozo) | 1.5 |
| Enter the traffic circle and take the 2nd exit towards Gozo | 30 m |
| Exit the traffic circle towards Gozo | 2 |
| Enter the traffic circle and take the 1st exit onto Triq il-Marfa (1) | 15 m |
| Exit the traffic circle onto Triq il-Marfa (1) | 600 m |
| Enter the traffic circle and take the 1st exit towards Gozo | 25 m |
| Exit the traffic circle towards Gozo | 1 |
| Enter the traffic circle and take the 1st exit towards Gozo | 20 m |
| Exit the traffic circle towards Gozo | 1.5 |
| Enter the traffic circle and take the 1st exit towards Għawdex (Gozo) | 20 m |
| Exit the traffic circle towards Għawdex (Gozo) | 1.5 |
| Turn left to stay on Triq il-Marfa (1) | 300 m |
| Take the ferry Iċ-Ċirkewwa (Malta) - Mġarr (Għawdex) | 5.5 |
| Continue straight | 250 m |
| Continue onto Triq ix-Xatt | 350 m |
| Make a slight right onto Triq Sant' Antnin (2) | 800 m |
| Enter the traffic circle and take the 1st exit onto Triq Borġ Għarib (2) | 4 m |
| Exit the traffic circle onto Triq Borġ Għarib (2) | 2 |
| Continue onto Triq il-Madonna tal-Ħniena (110) | 450 m |
| Turn left to stay on Triq il-Madonna tal-Ħniena (110) | 10 m |
| Enter the traffic circle and take the 3rd exit towards L-Għarb | 30 m |
| Exit the traffic circle towards L-Għarb | 45 m |
| Turn left onto Triq San Bert | 700 m |
| Turn left onto Triq San Żakkarija | 250 m |
| You have arrived at your destination, on the left | 0 m |


 Ηλιόλουστη/ο